
Please read instructions thoroughly before attempting completion of the Neil and Parks "Tubeless" Floater Housing.
WARNING: All components are shipped assembled for illustration purposes only.
IT IS YOUR RESPONSIBILITY FOR FINAL ASSEMBLY.
IT IS YOUR RESPONSIBILITY FOR FINAL ASSEMBLY.
Tools Needed
- Tig welder with competent operator
- Alignment Fixture for corresponding Floater Spindles
- Die grinder with abrasive stone/drum
- Milling Machine with face mill. You can use a right angle grinder for this if you have grinding skills and no mill.
- Calipers
- Tape Measure
Instructions
- Make sure the housing is fully welded. This includes all mounting brackets and tabs. You are allowed to leave off the filler bung, and we advise to do so as it makes the final welding much easier on the inside of the floater spindles. At this point, you should weld on the outer rings just like putting on a housing end on a flange axle type housing, using the appropriate alignment fixtures. LET COOL.
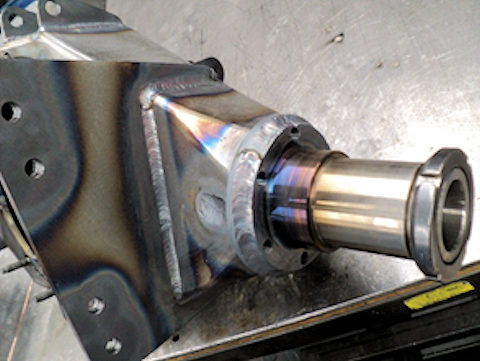
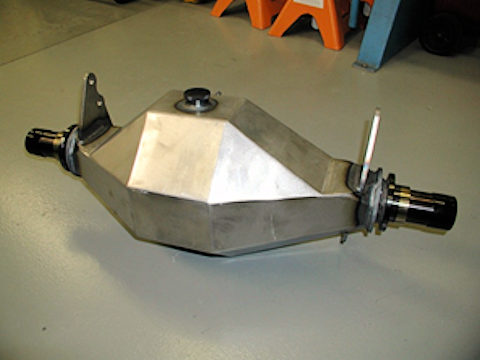
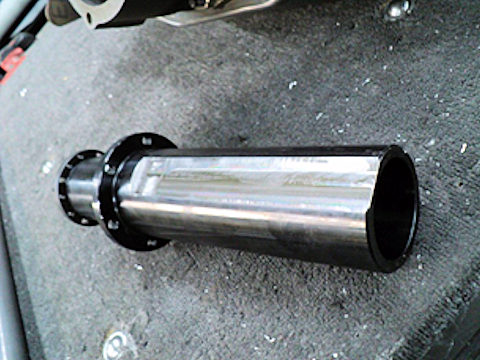
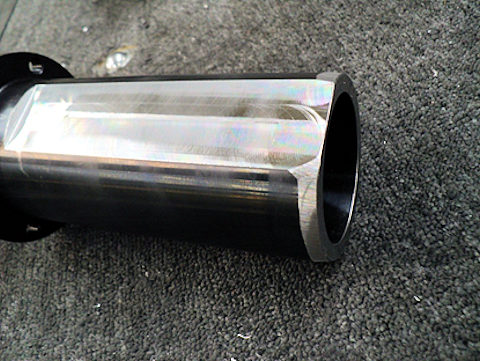
- Unpackage your floater spindles, and do the math to determine how wide you need to make the housing for proper tire to chassis clearance. Just about all the floaters come with instructions to make this calculation easy. There are two options for installation width on our housings. You can stick the spindle out of the housing "0" as depicted in the left photo, or you can "stickout" from 1/2", as depicted in the right photo, to as far as you are comfortable. We recommend not going over 2".
- Floater spindle length - Unless you are building a car with a really wide track width, all modern floater spindles are long enough to reach to the inner bulkhead without extending them. However, if you do have to extend them, turn a "tongue and groove' joint on the spindle and one on the length of tubing you need to extend it with a lathe, then weld together. You will have to grind/cut the weld down flush so make sure there is 99.9% weld penetration. Most of the time your piece of tubing will come from the cut off from the shorter side. If this is not enough, let us know, we probably have a scrap.
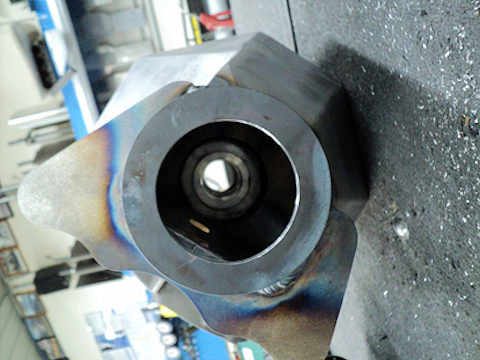
Measurement - Measure from the inner edge of the bulkhead, to the outer ring on the housing. Take this measurement, add the floater spindle "stickout" and subtract 3/32". This is where you need to cut the end of the floater spindle from the brake flange on the spindle, to make the width correct, and to make the inner edge of the spindle hit the midpoint of the bulkhead when installed. - Install your thirdmember alignment fixture into the housing, making sure to use the sealing appratus you are going to run the car with and use all fasteners. Most of our housing use an O-ring, even install that. If you use a gasket, use that, if you use silicone only, put it together "naked". If you don't build the rear end how you are going to run it, then the axles will absolutely be in a bind. You can see from the photo, the outer ring, the inner bulkhead, and the alignment pucks in the thirdmember.
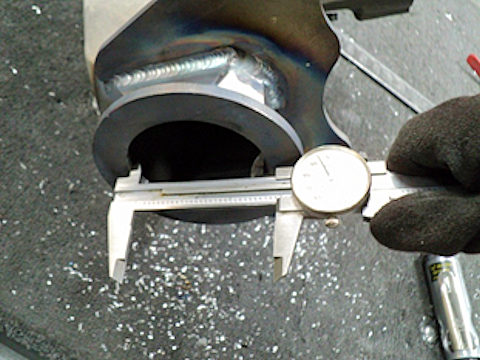
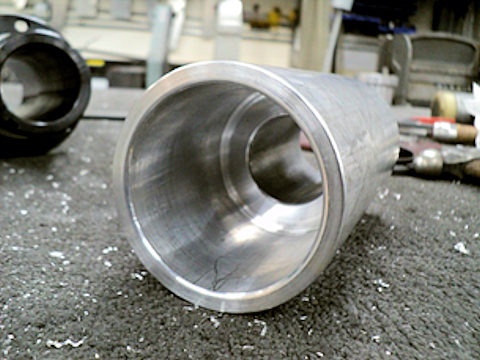
- Mark your spindles where the "flat" must stop. This will be the distance of your "stickout" + 1/8". This measurement is from the back side of the brake flange to the center of the outer ring, so that the step from flat to round is hidden under the outer ring. Now determine how deep your flat needs to be cut. Theoretically it is .0625", but this is rarely the number due to housing warpage. Use calipers and measure from the back of the faceplate to the opposite edge of the outer ring. Take 3" (diameter of the hole), and subtract the measurement. This will be how deep to cut the flat. Start by adding .010" to the calculated number, this may save you time later. See pic below. The particular housing depicted reads 2.895" So, the flat needs to be .105" + .010", making the first trial cut .115" deep. We recommend not going more than .175" deep. If your housing is that warped, please call for further instructions.
- Trial fit the spindle in the housing without the alignment bar. Chances are that the outer ring will have shrunk enough that you need to grind it out some to get the spindle to slide. Precision fit here is not real critical. The next hurdle will be getting the spindle to fit into the inner bulkhead. Chances are it shrunk too. Since getting all the way inside there is really difficult, we just bevel the corner of the spindle some. See pic below.
- Now that the spindle will fit into the housing, let's see if the alignment bar will too. It might, and it might not. If not, continue to grind the outer ring, cut the flat, or bevel the end until the alignment bar fits. A lot of time the flat will only need to be deeper on one end. Your alignment bar should locate off the bearing surface of the floater spindle. Not all spindles are concentric ID to OD, and this would affect your rear wheel alignment.

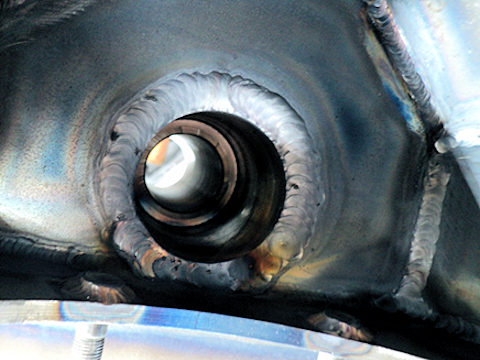
- Tack weld the spindles into position alternating sides of welding so that it pulls evenly. Tack the plug welds in the front too. Once, tacked well, fully weld around the outer ring and the plug welds. Remove the thirdmemebr and fully weld the inside fo the bulkhead to the spindle using a "bulky" weld. This is not a real good joint, but it's the only practical one we have come up with. This must be 100% welded. You can see the front side through the filler hole. After completing, go ahead and weld the filler bung on. You are done.
If you have any questions please call 785-422-8722.